
Create File Shares – Implement and Manage Storage for Azure Virtual Desktop
Create File Shares
File shares need to be created once the storage account is ready. FSLogix will be using the Azure storage account file share to store user profiles in the storage account.
Follow these steps to create file shares in the storage account created in the earlier step:
\ 1.\ Go to the storage account created in the earlier step and click “File share” in the left pane. Click “+ File share” to add an additional share. See Figure 5-13.
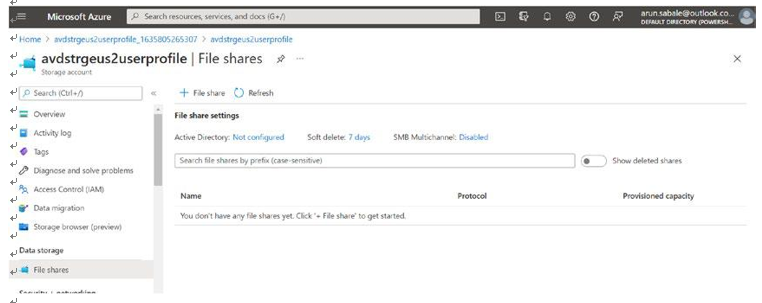
Figure 5-13. AVD user profile storage file share creation
\ 2.\ Enter the file share name and size, and click the Create button in the file share pop-up. See Figure 5-14.
Note File share names can contain only lowercase letters, numbers, and hyphens, and they must begin and end with a letter or a number. The name cannot contain two consecutive hyphens.
The minimum share size is 100 GB, but provision more capacity to get more performance (as of November 2021).

Figure 5-14. AVD user profile storage file share creation, new share
\ 3.\ Once the file share is ready, it will be visible under the “File share” option on the storage account. See Figure 5-15.
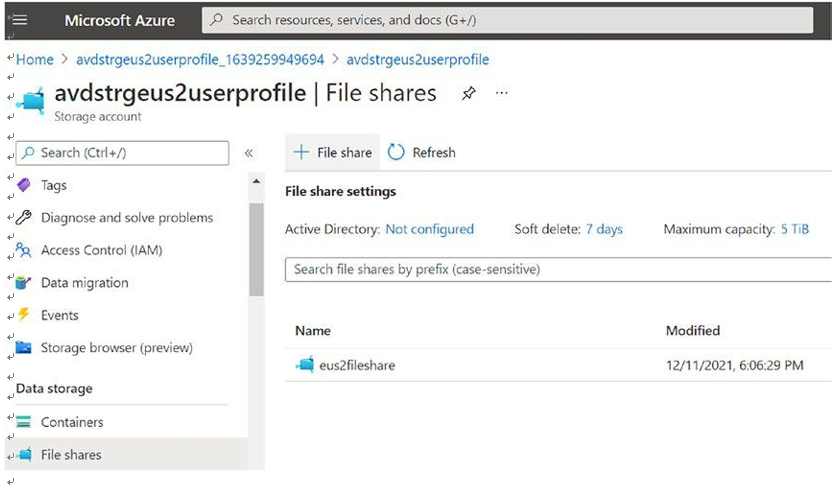
Figure 5-15. AVD user profile storage file share, new share creation
\ 4.\ Click the file share name, and you will be able to see the permission error in Figure 5-16 as the file share is locked to AVD Azure VNet. Resources/VMs from that VNet instance can access only the file share. It is always recommended to enable the private endpoint for the storage account to the AVD VNet, so the file share will be accessible directly from AVD VM over a private endpoint, and the traffic will not go over the Internet.
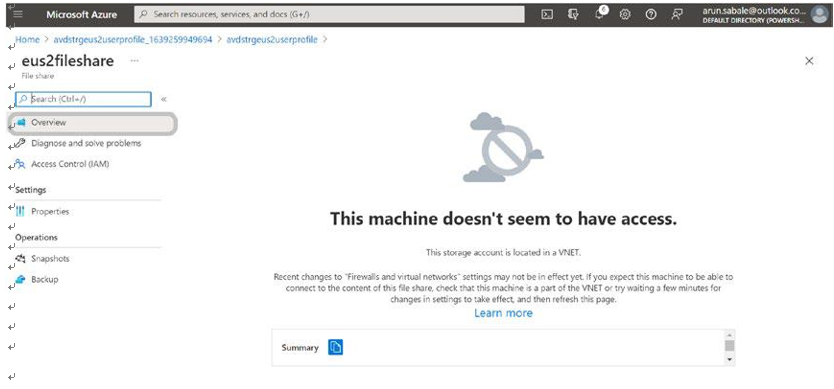
Figure 5-16. AVD user profile storage file share, Overview page
\ 5.\ Now you can go back to the “File share” option under the storage account to configure Active Directory for the file share. Click Active Directory on the right side, as shown in Figure 5-17.
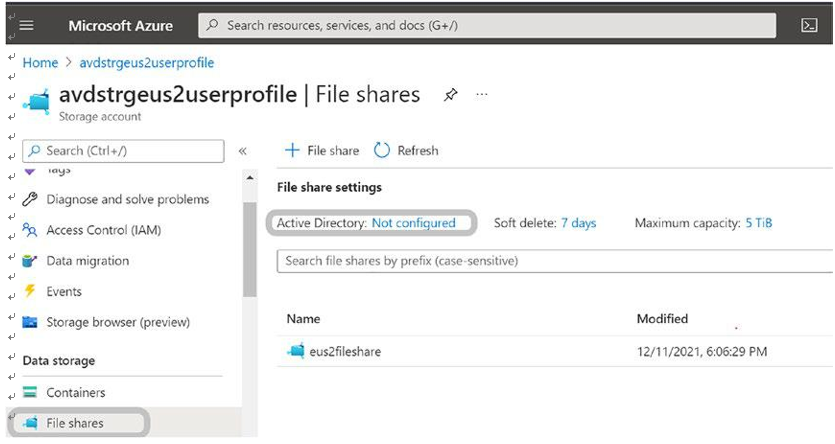
Figure 5-17. AVD user profile storage file share, domain join
\ 6.\ Once you click Active Directory, it will give you two different Active Directory options, as shown in Figure 5-18.
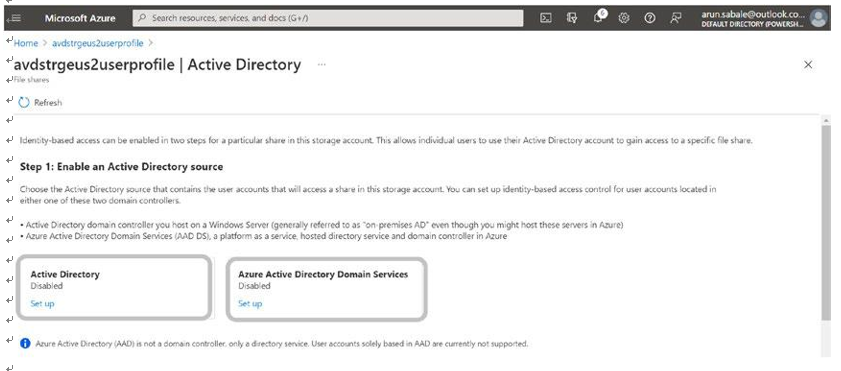
Figure 5-18. AVD user profile storage file share, domain join options
\ 7.\ Select the appropriate Active Directory that you are using and click the Setup button. If you are using Azure AD domain services, then it is easy to set up the Active Directory option for the storage account file share, as shown in Figure 5-19.
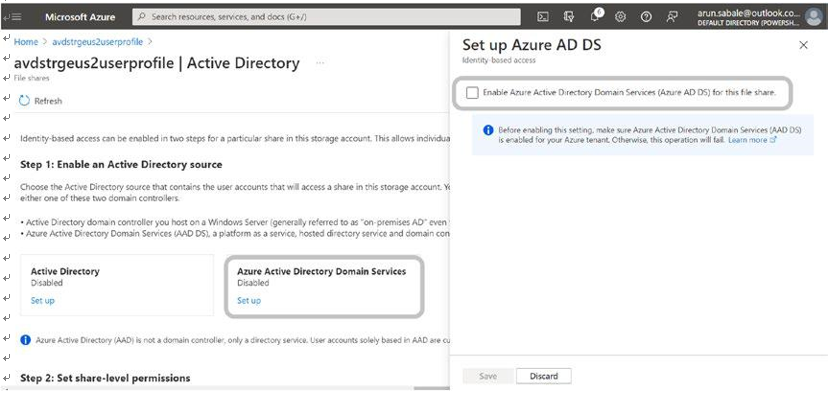
Figure 5-19. AVD user profile storage file share, domain join to Azure ADDS
\ 8.\ Once you enable Azure ADDS, then you will be able to see the screen in Figure 5-20. Note that you can use/configure only one AD (Azure ADDS or on-premises AD).
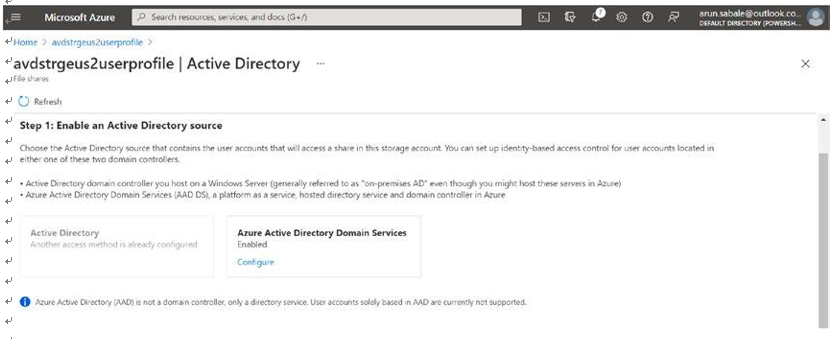
Figure 5-20. AVD user profile storage file share, domain join status
\ 9.\ Additionally, if you have an Active Directory user and a computer
console connected to your Azure AD domain, then you can check the Azure storage file share account/object under the AzureFilesConfig OU. See Figure 5-21.
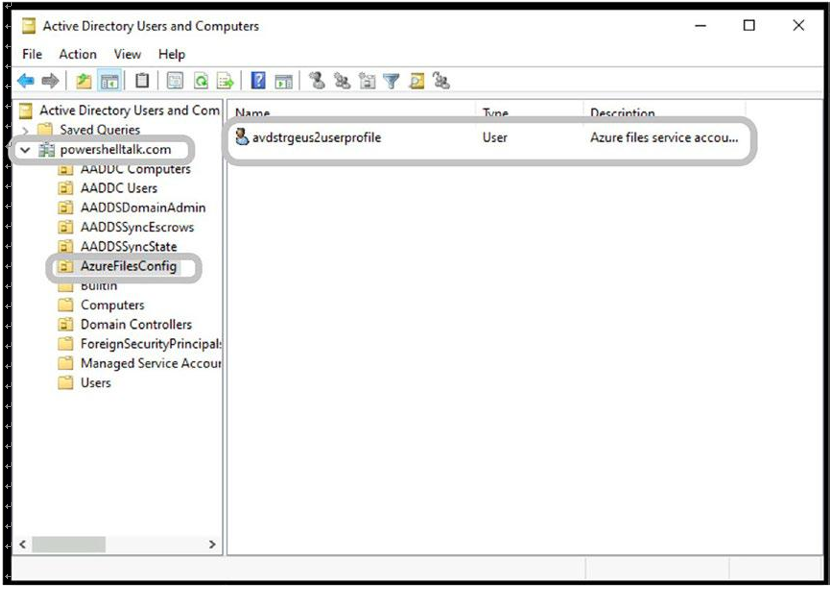
Figure 5-21. AVD user profile storage file share, domain join object
\ 10.\ If you are using an on-premises Active Directory Service (ADDS), then you need the AzFilesHybrid module (https:// github.com/Ar-Sa/azure-files-samples/tree/master/ AzFilesHybrid ) on the domain join so that you can run the Join-AzStorageAccountForAuth command to domain-join the file share. The following is the script you can run from any domain-joined VM (or download the PowerShell code from https:// github.com/Ar-Sa/Arun/blob/master/Powershell/Azure%20 storage%20account%20file%20share%20domain%20join/set-AzStorageDomainJoin.ps1):